 've had this gray tank top laying around for awhile, waiting for a little breath of life. So this morning I finally decided to give it a little attention.
I love rosettes...on just about anything.
So why not add a few rosettes to the tank. I love the ones from J Crew and Anthropologie. (Did I mention that I LOVE Anthropologie??? *sigh*)
Want to make a cute new shirt??
Here's what you'll need...
- shirt
- old shirt or fabric
- scraps of felt
- scissors, needle, thread, straight pins
I used a tank top and a piece of ribbed knit cotton, cut into 1 inch strips. The length of your strip will depend on how big you want your rosette.
 Start by folding the end of your strip in half.
 Take that and fold the end over to the edge, like a little triangle.
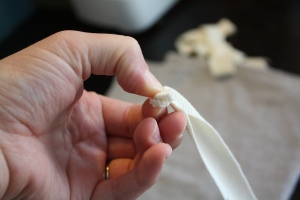 Now take that and start to roll it.
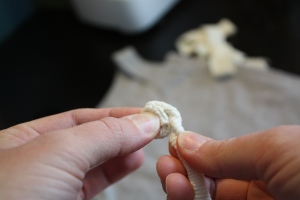 Twist the tail as you wrap it around.
 It should be taking shape now and starting to look like a rosette! You can make this as big or small as you want, depends on the size of strips you started with. When I decided on the size, I stuck a straight pin through the entire thing to keep it together while I made others.
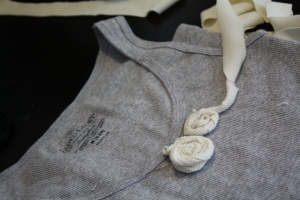 Lay them out so that you can visualize the size and quantity that you want.
 My design changed a lot from beginning to end. Also you need to take into consideration when you are deciding on placement, if you are using a knit fabric, it will stretch.
 Once you decide on your design placement, you can finish your rosettes.
Grab your felt, scissors, needle and thread...
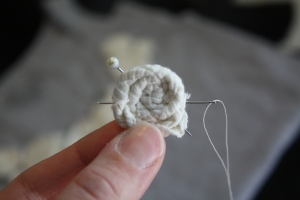 Ok, go ahead and sew right through the middle of your rosette. Once I had it through the center, I reinserted it at an angle and continued doing this two or three times until I felt like I had sewn through all of the layers and was confident that it wasn't going to unravel!
*Now i will warn you, this can be difficult at times, depending on how big or thick your rosette is. I used a little piece of grippy shelf liner to help pull the needle through from time to time.
 I cut a small piece of felt and sewed it to the backside, to give it a little more reinforcement. Once you have finished all of your rosettes, it's time to sew them on the shirt.
 Place your rosette on the shirt, you can hold it or pin it while you sew. I just held mine in place, my fingers were feeling like pincushions at this point, it was just easier at this point! Use a simple stitch of your choice and sew it to the shirt. Easy peasy.
 All finished. Put it on and admire your work.
 Thanks B for the finished pictures!!!
And don't forget our Flickr pool!! We're always eager to see what you've made!


That is so pretty, what a great shirt! Thanks so much for the idea, I'll be linking.
ReplyDeleteKara, this looks so cute. Can't wait to try it myself!
ReplyDeleteWonderful tutorial-thank you!
ReplyDeleteWay cute! Thanks for this!
ReplyDeleteI hope you do!! I want to see pictures!!
ReplyDeleteI'm glad you liked it! Thanks for stopping by.
ReplyDeleteThanks so much!
ReplyDeleteI love it! I am hosting Flower Week on my blog. I hope you'll stop by! http://singingthreelittlebirds.blogspot.com/2010/05/flower-week-begins-may-24th.html
ReplyDeleteThanks, I will definitely check that out!
ReplyDelete[...] from the back, make sure to sew through all layers. (This is just like the way you sew this and this.) Finish off the end with a good strong [...]
ReplyDeleteThe grippy shelf liner tip is genius! Don't know how many times I've had sore fingers from try to push a needle through several layers of felt! Really cute top!
ReplyDelete