Tuesday, April 27, 2010

Pretty Paper Flower Clips

I ran across this article the other day and new that I must drop everything that I was doing and make one of these "paper mâché" flowers.  LOVE these flowers.  Everything about these big vibrant flowers screams awesome!  But, maybe a little too big for my day to day wear.

So...why not make a smaller version?

Lapel pin?

Hair Clip?

The possibilities are endless.
(Adapted from here)

Here we go:

  • Paper (newsprint, construction, lol, whatever kind you have laying around)

  • Modge Podge

  • craft paint

  • paint brush, scissors, compass, alligator clip or lapel pin, hot glue


Start off by drawing 3 circles in each of the following sizes 2 1/2″, 2 ″, 1 1/2″, 1/2″
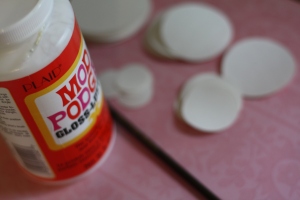


Next, you're going to paint one circle with modge podge and stick the next circle of the same size to it, repeat with the last circle.  All your same size circles should be stuck together to make one circle.  Repeat with remaining sizes.
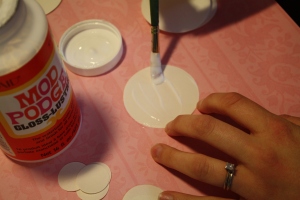
Next your going to cut notches around the circle to make your petals.


Fold the petals toward the center, creasing where the petals meet the center.


Once you have all of your flowers cut out, it's time to paint them.  Paint the front one color and the back another color.  You can choose any color you want for the center.


Now, grab the glue gun.  Place a dab of glue in the center of the large flower place the medium in the center, aligning the petals.  Repeat with remaining flowers and center.

Your flower is finished.  Now you can glue it to a lapel pin back or an alligator clip.

Enjoy your new accessory!!

Friday, April 23, 2010

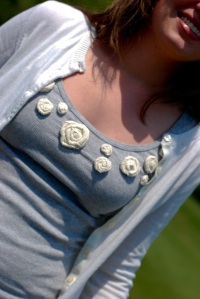
Rosette Shirt

I've had this gray tank top laying around for awhile, waiting for a little breath of life.  So this morning I finally decided to give it a little attention.

I love rosettes...on just about anything.

So why not add a few rosettes to the tank.  I love the ones from J Crew and Anthropologie.  (Did I mention that I LOVE Anthropologie???  *sigh*)

Want to make a cute new shirt??

Here's what you'll need...


  • shirt


  • old shirt or fabric

  • scraps of felt

  • scissors, needle, thread, straight pins


I used a tank top and a piece of ribbed knit cotton, cut into 1 inch strips.  The length of your strip will depend on how big you want your rosette.

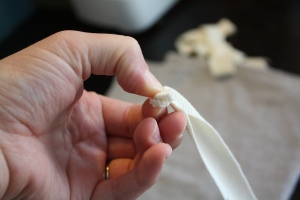
Start by folding the end of your strip in half.

Take that and fold the end over to the edge, like a little triangle.

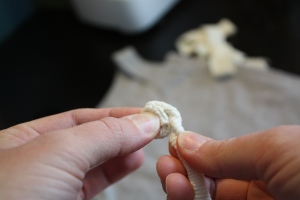
Now take that and start to roll it.

Twist the tail as you wrap it around.

It should be taking shape now and starting to look like a rosette!  You can make this as big or small as you want, depends on the size of strips you started with.  When I decided on the size, I stuck a straight pin through the entire thing to keep it together while I made others.

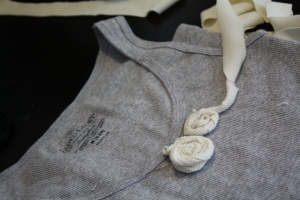
Lay them out so that you can visualize the size and quantity that you want.

My design changed a lot from beginning to end.  Also you need to take into consideration when you are deciding on placement, if you are using a knit fabric, it will stretch.

Once you decide on your design placement, you can finish your rosettes.

Grab your felt, scissors, needle and thread...

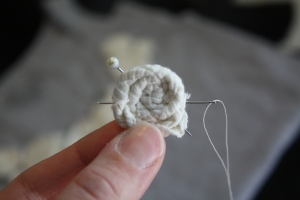
Ok, go ahead and sew right through the middle of your rosette.  Once I had it through the center, I reinserted it at an angle and continued doing this two or three times until I felt like I had sewn through all of the layers and was confident that it wasn't going to unravel!


*Now i will warn you, this can be difficult at times, depending on how big or thick your rosette is.  I used a little piece of grippy shelf liner to help pull the needle through from time to time.

I cut a small piece of felt and sewed it to the backside, to give it a little more reinforcement.  Once you have finished all of your rosettes, it's time to sew them on the shirt.

Place your rosette on the shirt, you can hold it or pin it while you sew.  I just held mine in place, my fingers were feeling like pincushions at this point, it was just easier at this point!  Use a simple stitch of your choice and sew it to the shirt.  Easy peasy.

All finished.  Put it on and admire your work.

Thanks B for the finished pictures!!!

And don't forget our Flickr pool!!  We're always eager to see what you've made!
Thursday, April 15, 2010

Pillowcase Dress

I finally jumped on the "pillowcase" dress bandwagon.  I've seen them all over the place and thought it was finally time to give it a try.

It was incredibly easy to make.  I used a couple different sites as references.

In the end, I just kind of did my own thing.    Instead of making a pocket for the long ties, I made a casing and added elastic.  Making the neck line stretchy, and adding straps that tie at the top. I used the same fabric from the ties to make a contrasting band at the bottom of the dress, just for a little added detail.


The nice thing about this dress is that it will fit her for a long time and she liked it!

Tuesday, April 13, 2010

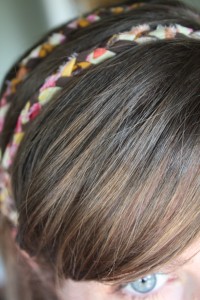
Quick Headband

I've wanted to make this headband for a long time. I had a few spare minutes this morning, so I seized the opportunity to whip this up.

It took about fifteen minutes start to finish.

I love projects that are fast, I love instant gratification, I really do.

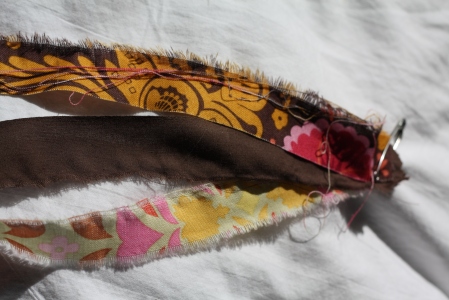
It started with 6 strips of 1/2" x 18" fabric.

a couple of safety pins.


A little bit of braiding


I sewed the ends together, attached enough elastic to make it fit comfortably around my head.  All finished.

Saturday, April 10, 2010

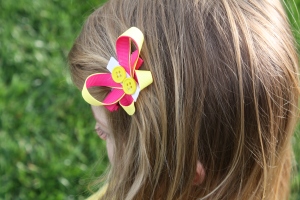
Butterfly Hair Clips

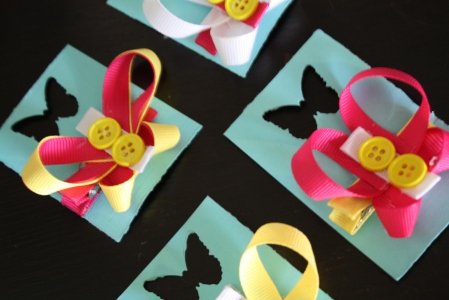
Here's a quick how-to on making a butterfly hair clips using ribbons and a couple of buttons.

Ready??

OK, here's what you'll need...

Ribbon

Coordinating buttons

Glue gun

Alligator hair clip (at least I think that's what it's called!)

Scissors, ruler, small scrap of grippy cabinet/shelf liner stuff

  1. Cut one length of 7" ribbon for the upper section, one length of 3 1/2 " ribbon for the lower half, and a 2" piece for the center section.

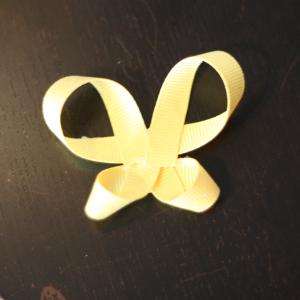
  2. Take one piece of ribbon and fold it in half, make a little crease just so that you know where the middle is.  Next fold on end towards the center, making sure that the backside  (of the end) of the ribbon is touching the front once the two meet.  Glue the end of the ribbon to that middle crease.

  3. Now repeat with the other end.  Both sides should now be the same, and this will make the upper section of your butterfly.

  4. Now take the  smaller piece and repeat step two and three.  This will make your lower half.  (somewhat blurry picture warning!)

  5. Place a small drop of glue on the middle of the lower section; place the upper section on top and press together however you like it.  Hopefully you're starting to see a butterfly taking shape!

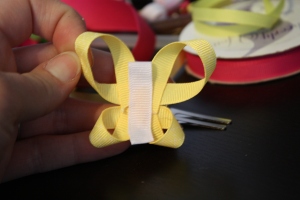
  6. Take your last little piece of ribbon, and fold each of the ends over just a bit and glue, that way you won't have any raw edges showing. 

  7. Once you have the edges glued you can run a line of glue down the center of your butterfly and place the "body" on there.

  8. Add a couple of ribbons and glue it to your covered hair clip, you can glue it vertically or horizontally.  Now you are finished!!  (for info on covering a hair clip with ribbon see below.)


To cover the hair clip all you have to do is...cut a length of ribbon to about 4 1/2 inches, and run a line of glue down the top inside part of your hair clip and place your ribbon on the glue.  Now cover the top part with glue and adhere the ribbon.  Now flip it over and add on final dab of glue to the back and glue the end down.  I also add a tiny strip of grippy shelf liner to the upper inner part to keep it from slipping out of my daughter's hair.  I hope this makes sense!!  Sorry I didn't take pictures of that part.

Friday, April 2, 2010

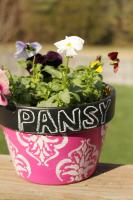
Chalkboard Flower Pot

I bought a few white pots from Ikea last week, with the intentions of using them for herbs in my kitchen.  Well, I left them in Atlanta, and being the rather impatient person that I am, decided to paint some additional pots to use with them.  I thought it would be a great idea to paint a basic flower pot white and use chalkboard paint around the rim.  That way I could label what's inside the pot.  Want to make one? It's really easy!

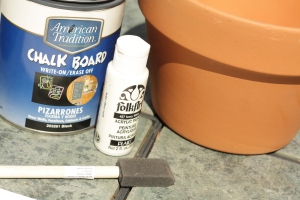
What you're going to need...

A flower pot

chalkboard paint

craft/ acrylic paint

brushes

stencil if you want to get creative.

Modge Podge

Ok, so begin by painting the bottom of your pot.


(So like I said earlier, this pot was intended to be white.  While staring at this white pot, I was  compelled to paint some little pictures in varying shades of color all over this poor little helpless pot.  At some point all quality control was thrown out the window.  It was awful, paint in way to many colors and patterns and places.  So what do you do when it is a disaster and you don't want to waste a perfectly good pot??  Why not paint it pink...)

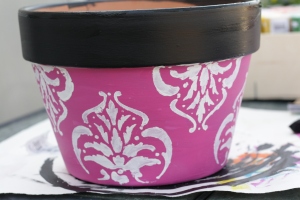
Okay, now that your base is painted, paint the rim with your chalkboard paint.  I used two coats.

So you could be almost finished at that step...unless your me and can't be happy with a pink pot whose paint disaster wasn't totally covered by the new layer of paint!  So why not pull out a stencil and attempt to once again cover up a mistake!

Okay now, much better!

I added a coat of Modge Podge here to seal it.

Now for the flowers.

Now you can write whatever you want on there.  Wouldn't these make super cute Mother's Day gifts???

Have a great weekend!!