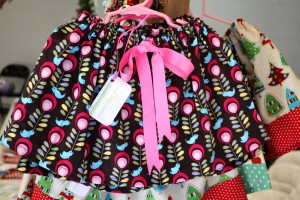
Merry Christmas!!
Saturday, December 25, 2010
Thursday, December 16, 2010
Mohren-Haus
Our trip to Germany was incredible! I told my husband that I am ready to pack up and move there…he wasn’t ready to make that kind of commitment though! The city of Bamberg is like a walking into a fairy tale or a time machine. It was absolutely beautiful…and there were some amazing stores there! I mean that’s really all you need to know to pack up and move halfway across the world, right??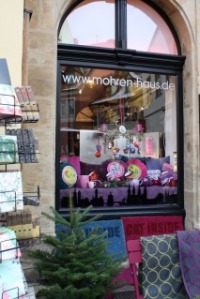 One of the coolest and quite possibly my all time favorite store was Mohren-Haus. I L.O.V.E. this store. I wanted to move into this store, my husband thought that I had. It was only after coming in to retrieve me that he remarked “Oh, now I see why you’ve been in here for so long…this store is totally you.”
This place smelled wonderful, you enter the store through a room full of teas, floor to ceiling. I picked up a Christmas blend that smells better and tastes unlike any tea I have ever tried. SO GOOD.
The colors, oh the colors. I wanted one of everything in that store, budget and space prevented that from happening.

I picked up a couple of candle holders, red ones.

You can barely see the top of a really cute teacake pan that I got.

Did I mention the colors??
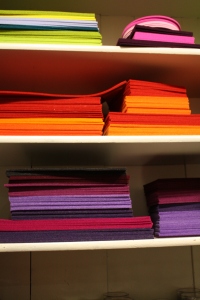
The felt???

I was ready to hand over my wallet.

Yes, I took pictures, lots and lots of pictures.

These cups were too fun to pass up.

This is only a small portion of the store. There were two floors, and a million different rooms all equally fun and appealing. I cannot wait to go back!!!
 One of the coolest and quite possibly my all time favorite store was Mohren-Haus. I L.O.V.E. this store. I wanted to move into this store, my husband thought that I had. It was only after coming in to retrieve me that he remarked “Oh, now I see why you’ve been in here for so long…this store is totally you.”
This place smelled wonderful, you enter the store through a room full of teas, floor to ceiling. I picked up a Christmas blend that smells better and tastes unlike any tea I have ever tried. SO GOOD.

The colors, oh the colors. I wanted one of everything in that store, budget and space prevented that from happening.

I picked up a couple of candle holders, red ones.

You can barely see the top of a really cute teacake pan that I got.

Did I mention the colors??

The felt???

I was ready to hand over my wallet.

Yes, I took pictures, lots and lots of pictures.

These cups were too fun to pass up.

This is only a small portion of the store. There were two floors, and a million different rooms all equally fun and appealing. I cannot wait to go back!!!
Saturday, November 27, 2010
Guten Tag!!
So, I'm currently in Germany. I wanted to share a few inspiring pictures with you! Wow. Let me tell you there are some incredibly cool things here and I'm pretty sure that I cannot bring most of them home! A few things from today that I love!!!
This window diplay was so pretty!! I am in love with the colors. I think I need one of each of these items...I love the pillows, I see a need to make some when I get home!!
My little lady is loving the carousel ride, I am loving the color of this pink scooter she is on!
And this is my travel bag! I have made so many things out of this fabric, what can I say, I am quite smitten by it. This is a great bag, it's from I think sew and it's called the 91 cross bag or messenger bag.
I'm sure that I will have lots more to share with you!!
Wednesday, November 10, 2010
The $1 Skirt
Okay, so we (Mama #2 and I) were walking through Wal-mart yesterday when we saw 5 racks that were marked down to $1. Not our typical place to shop for clothing, but when you see it's only a dollar you have to stop and look, right?! So it was mostly what you would imagine finding in the WM clothing markdown section...lots of comical things, but there was this denim skirt...that was kind of, sort of, maybe almost cute. You know the kind, right? You would only buy it if the price were awesome and you would definitely have to do something to it to make it wearable, but it has potential kind of thing. Well this is what we found for that price, a (short) denim skirt. Add a fun and colorful little ruffle to the bottom and here you have a new inexpensive skirt. Throw on ap pair of colorful tights,like the ones that my husband says makes my legs look like an Avatar character (Love him!!) and it's a perfect fall skirt!
Wednesday, October 20, 2010
Sew Hip Kids
As you know, I love to sew and make things. I've been selling my designs since 2007. This past weekend I was invited to sell some of my things at a small venue. It was lots of fun, and I wanted to share some pictures with you. I will be selling at another show in November and after that I will probably put some thing in my Etsy shop...so if you see anything you are interested in, let me know!
I had a variety of things that I make available on Saturday. There were skirts and aprons.
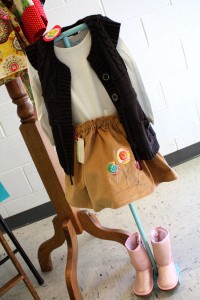
This corduroy skirt, which happened to be my favorite, used brown birds from Robert Kaufmans Cool Cords line. I made matching hair clips to go with the skirts. I love them!!
 This past weekend I was invited to sell some of my things at a small venue. It was lots of fun, and I wanted to share some pictures with you. I will be selling at another show in November and after that I will probably put some thing in my Etsy shop...so if you see anything you are interested in, let me know!
I had a variety of things that I make available on Saturday. There were skirts and aprons.
This corduroy skirt, which happened to be my favorite, used brown birds from Robert Kaufmans Cool Cords line. I made matching hair clips to go with the skirts. I love them!!
You can see them in the top portion of the picture below. I made them in a blue colorway to match the blue bird skirt as well.
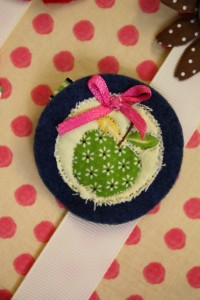
These little apple hair clips are so cute! I am seriously considering making one for myself. Is that crazy?
This hair clip display board was made from an old ikea print that had ripped and landed in our trash pile. I rescued it and stowed it away in a closet until it hit me that I could use it to display the hair clips. I love this fabric. It's from Tina Givens Fairy Tip Toes line.
This little display stand is based on a really cool one that my friend B has. (She also painted the sign hanging above for a show we did last year...she is SO talented!!) It worked great for displaying this fun skirt. Again, what would you think of a mommy sized version of this skirt? I really want one...
There was even a little section of "gourmet" felt food items! My kids play with felt foods I've made on a daily basis, in fact, they even snagged a pot and some pasta that I had intended to display on the little stove top!
I had a nice long nap after it was over. Sunday had no plans, so we just stayed home and I attempted to make sense of the chaos that is my "sewing studio"
Please and Thank you
I'm glad that these tutorials have been helpful to so many of you. I would ask that you PLEASE do not sell things that you've made using my ideas. Please contact me if you have questions. Thanks!
Tuesday, October 5, 2010
The Hat
Ok, so...here it is, a few days later than promised! Sorry, sometimes it seems that finding an extra hour or two to post a new tutorial is impossible!
What you will need...

- Fleece
- ruler
- scissors or rotary cutter
- thread and a needle, sewing machine
For the flower
- 3" strip of 44"long fabric
- needle, thread, pins
 Measure the head of your recipient! For my 5 year old son, I cut a piece of fleece 22" by 12", and for my 3 year old daughter I cut a 20" by 10".
Bring the short sides together, sew from end to end.
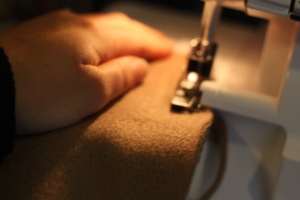 You should have a tube. Now sew along the top. There should only be one opening now, you can see the basic shape of a hat!
 Take the open edge and fold it up a 1/2-1", your choice. (Make sure that all of your seam are on the same side, so that when you flip the hat the right way, you don't throw it across the room when you realize that the cute hat you just finished has an unfinished seam exposed on the top of the hat... you will not enjoy fixing your mistake...I didn't...) Sew all the way around, I used two seems, just because I liked the way it looked.
 Now grab your needle and thread it, start on one end a sew a big gathering stitch all the way across the top. When you get to the end, pull it tight and gather the fabric. Knot the end a few times and you are done with the hat. Easy peasy.
Ok, for the flower. It's much like many of the other flowers on the blog, but this time instead of rolling them, I simply folded the fabric. I didn't take pictures for this step...Sorry, but it's really easy I promise!
- Take your strip of fabric and fold it in half, you can iron it if you want to make sure it really stays folded, I didn't, because I like the messy look.
- Begin by folding or just knotting the end so that you have a center, again, just depends on if you like the raw edge showing more.
- Once you have a knot in the center, begin to fold the fabric once and twist. Keep doing this until you reach the end of your fabric, fold the end under the last section. You can pin it as you go, if you want to make sure it doesn't fall apart when you start to sew it together, ahem...
- Sew from the back, make sure to sew through all layers. (This is just like the way you sew this and this.) Finish off the end with a good strong knot!
- Now you can pin this to the hat wherever you want it. Sew it on and you are finished! I made several of these flowers, attached them to various things, like a hair clip and then clipped it on to the side of a headband!

Wednesday, September 29, 2010
A New Hat
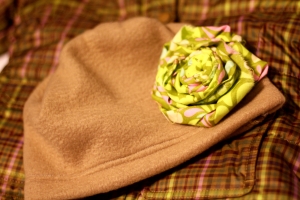 With cooler weather approaching, it's finally time to break out the winter scarves and hats. Now that the kids have new jackets, they need new hats...right?! Well, regardless, it calls for making a couple fun, easy and cute hats!
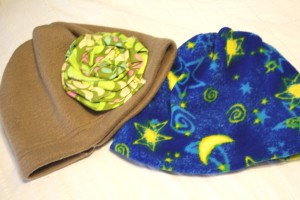
My daughter loves just about anything that has a bright and fun flower stuck to it, even the brown fleece fabric that my son was convinced that she "would just not like." She really liked it, to my relief!
You can whip this hat up in minutes, really, it's simple to make. You will have fun making tons of them and adding lots of embellishments. So, if you want to learn how to make this super cute and easy hat and flower, check back tomorrow!!
Tuesday, September 21, 2010
A big thanks to you!!
Well, I can't tell you how thankful I am for the lovely comments on the last post. You are all so sweet, thanks!!!
Thanks to the random number generator, I would like to say congrats to comment #17 who said...
nannergirl
 I love the clothes I’ve made from your wonderful tutorials. My daughter wore her skirt yesterday and got several compliments
  And I love pie – I’ve got one in the oven right now – so yummy! Happy (early) birthday!
You will be getting an email from me shortly!!!!
Thanks again everyone!!!! I look forward to sharing new stuff with you!!
Thanks to the random number generator, I would like to say congrats to comment #17 who said...
nannergirl
You will be getting an email from me shortly!!!!
Thanks again everyone!!!! I look forward to sharing new stuff with you!!
Monday, September 13, 2010
Lucky me, lucky you
 A few weeks ago, I received this lovely scarf from a friend that I met through this blog. It is beautiful and special, since I have never met this person, yet they chose something that suits me perfectly. A big thanks to you, I love it!!
I love all the wonderful comments and emails that I have received from so many of you! I cannot tell you how encouraging it is. So since I will be celebrating a birthday in a few days, I am feeling thankful and very grateful. Lucky you!
 I will be giving away a new copy of Amy Butler's In Stitches book, it's a beautiful book, and a remnant piece of Michael Millers Escape fabric, there are seven boxes left from the original panel that had 8.
If you would like to a chance to receive these goodies, along with whatever other things I decided to throw in the package, then all you have to do is leave a comment here. Tell me something fun...or that you love...or even something that you would like to see more of on this blog. I look forward to hearing from you!! You have until next Monday the 2oth!!
Sunday, September 12, 2010
Greatful
Just a quick note to all of you who read this little blog. Thank you so much for your kind words and emails. They are greatly appreciated and it really helps to keep on posting things here. I think that there are so many wonderful people out there and I am truly touched by you
Wednesday, August 25, 2010
Simple Skirt
 Remember the easy skirts from this post? Well, today I am going to tell you how to make a really easy skirt! If you have small amounts of fabric that you want to use, that are just under half a yard or so, try this, you will be happy with the quick and easy results! You can make several of these in a short period of time.
Here's what you're going to need...

- Fabrics: 1 for the main part and one for the accent panel (if you want.)
- elastic 3/4 to 1 inch wide
- thread, scissors, ruler, safety pin
 To begin, measure your recipient and decide the length that you want the skirt to be. For my skirt, I want it to be approximately 14 inches long. I am going to make the lower quarter of my skirt with a different fabric, so I need to determine how long to make each piece of fabric. (You might want to make sure that you iron your fabric first, especially if you've had it folded for a while...probably should have done that before taking the picture!)
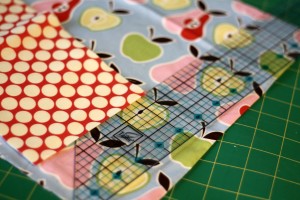 I will be using the entire 44" width by 5" for my accent and 44" by about 13" for the main panel.
 Once I have those pieces cut, I am going to begin sewing. I serged my two pieces together, sewing along the longest length, if you don't have a serger, just use your sewing machine. You can allot an extra 1/2-1 inch if you want to fold the seem over to cover the unfinished edge.
 Now you should have a one piece total. Take the short sides and pin right sides together, serge or sew from one end to the other. Back stitch on both ends. It should now look like a tube.
 Next get your iron and press fabric over a 1/4" on the top edge and the bottom edge, making sure that you press the right side over the wrong side.
 Now on the bottom edge, fold that pressed edge over again, another 1/2" and press again.
 On the top edge fold it over 1"-1 1/4" depending on the size of your elastic, press. This will make your elastic casing.
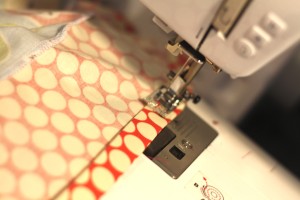 Now sew the bottom edge all the way around.
 Sew the top edge, leaving a 2" -3" opening for the elastic. Back stitch on both ends.
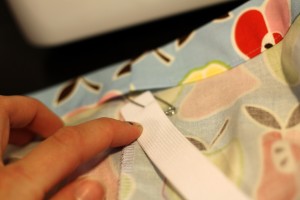 Attach your safety pin to one end of the elastic and feed it through the casing.
 When you get back to the beginning, sew the two ends of your elastic together by laying one on top of the other and using a zig zag stitch go over it a few times for extra strength. Now tuck it in to the casing and sew the opening closed.
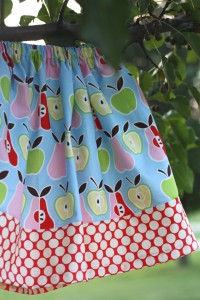 You are all finished. See how easy that was??
Now if you wanted to add a little more to this skirt, you could add a pocket or two onto the front. Make them round or square, your choice, either would make a cute addition.
I think a little ruffle as the accent panel would be cute too.
Enjoy! And please if you use one of the tutorials listed on this site, please give credit to the site. Thanks.
Don't forget to add yours to the Flickr pool.
Subscribe to:
Comments (Atom)


