Well, after a not so fun stomach bug experience this week, we're back.
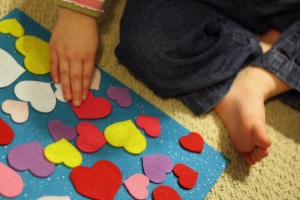
The kids and I have cut out lots of felt hearts today. They love just sticking them to more felt and making pictures. I want to do a little more. Not sure what yet, I'm thinking about maybe making felt conversation hearts or maybe little heart cupcakes. I don't know, something Valentines-y. (That's a word, right?) What ever it turns out to be, I will share it with you, in fact, I'll even show you how to make it too!!
Have a great weekend. We're supposed to get lots of snow, so there should be plenty of time for crafting...and cocoa. They do go hand in hand you know.
Friday, January 29, 2010
Tuesday, January 26, 2010
The Bubble Skirt Tutorial!!!
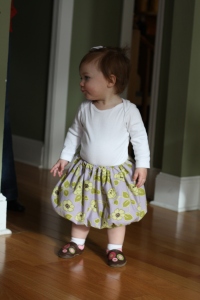
I'm loving the bubble skirt trend right now. I don't know what it is about seeing that puffy skirt on a little girl; it's so sweet and innocent. Naturally, I had to make one. So here's a little glimpse of the skirt. My little one would have no part in modeling this skirt, so Ms. C happily obliged for a few photos. She's such a cutie!
Intrigued? Want to make one for your little one? (Or for yourself, don't worry, we want one too!) Well, here's a step by step guide to making one or four, once you start making them you may want to make a bunch of them! They are so simple to make! PLUS they're reversible!!!
Ok, so to begin you'll want to measure your recipient. You will need to know the measurement from the waist to the knee (or however long you want it to be.) Add 1 1/2 inches to this and this will be the amount you need for the interior fabric. For the exterior you will want to add on about 3 1/2 inches and that will be the amount of fabric you need. You will also want to know the waist measurement for the elastic waistband. Now once you know these you will be able to figure out how much fabric you need.
What you will need:
To begin:
Cut out your fabric using the measurements that you recorded earlier. You should have two large rectangles.
With right sides together, line up the short edges of one piece and sew a 1/2 inch seam. Back stitching at the beginning and end. Now repeat with the other fabric.
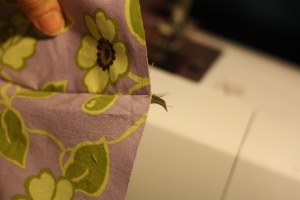
Press seams open.
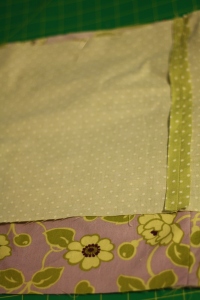
You should have two tubes. Good job. Now insert the larger tube inside the smaller one with right sides facing each other.
Line up the bottom edges and pin all the way round.
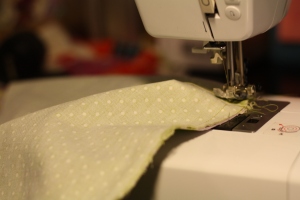
Sew your seam close to the edge, about 1/4 inch or so, all the way around. Now sew another seam about 3/8 to 1/2 inch from the first seam, ( it needs to be big enough to fit your 1/4 elastic through.) leaving an opening to feed the 30" piece of elastic through.
Now using a safety pin attached to the end, feed your elastic through the casing you just sewed. Once it's through, sew the two ends of elastic together. Tuck it in and sew the opening closed.
Congrats you're halfway there. You just finished the bottom bubble part of the skirt!
Next flip your skirt right sides out. Your main fabric will be longer than the lining fabric.
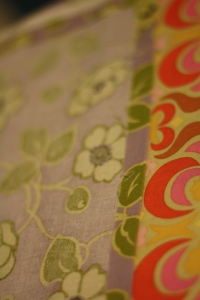
Take the edge of your main fabric, fold it over about 1/2 inch and press.
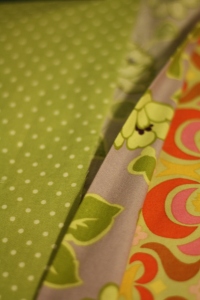
Now take that pressed edge and fold it over so that it covers the lining part.
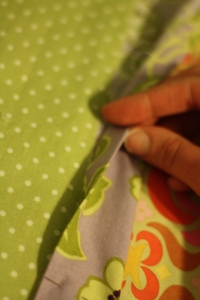
Make sure that your edge covers the edge of the lining fabric. I made sure that the two raw edges were aligned as I pinned them together.
I stitched as close to the edge as possible all the way around, leaving an opening for the elastic.
Feed your elastic through just as you did on the bottom part.
Once again bring the two ends together. Sew. Tuck into the casing. Sew the opening closed.
You are finished!!!!
If you wanted, you could add a little bow or some type of embellishment to the waistband or anywhere really.
Hope you enjoy your new creation!!!
Don't forget, we'd love to see what you've made...please upload a picture to our Flickr group.
http://www.flickr.com/groups/sewhipmama/
Intrigued? Want to make one for your little one? (Or for yourself, don't worry, we want one too!) Well, here's a step by step guide to making one or four, once you start making them you may want to make a bunch of them! They are so simple to make! PLUS they're reversible!!!
The Bubble Skirt:
Ok, so to begin you'll want to measure your recipient. You will need to know the measurement from the waist to the knee (or however long you want it to be.) Add 1 1/2 inches to this and this will be the amount you need for the interior fabric. For the exterior you will want to add on about 3 1/2 inches and that will be the amount of fabric you need. You will also want to know the waist measurement for the elastic waistband. Now once you know these you will be able to figure out how much fabric you need.
What you will need:
- Fabric one for the interior and one for the exterior. (1/2-1 yard or so of each depending on your measurements.)
- elastic 1 inch (enough for waistband) and also 30 inches of 1-4 inch. (add more if you are making it for a child over the age 5.)
- thread, scissors, iron, ruler
To begin:
Cut out your fabric using the measurements that you recorded earlier. You should have two large rectangles.
With right sides together, line up the short edges of one piece and sew a 1/2 inch seam. Back stitching at the beginning and end. Now repeat with the other fabric.
Press seams open.
You should have two tubes. Good job. Now insert the larger tube inside the smaller one with right sides facing each other.
Line up the bottom edges and pin all the way round.
Sew your seam close to the edge, about 1/4 inch or so, all the way around. Now sew another seam about 3/8 to 1/2 inch from the first seam, ( it needs to be big enough to fit your 1/4 elastic through.) leaving an opening to feed the 30" piece of elastic through.
Now using a safety pin attached to the end, feed your elastic through the casing you just sewed. Once it's through, sew the two ends of elastic together. Tuck it in and sew the opening closed.
Congrats you're halfway there. You just finished the bottom bubble part of the skirt!
Next flip your skirt right sides out. Your main fabric will be longer than the lining fabric.
Take the edge of your main fabric, fold it over about 1/2 inch and press.
Now take that pressed edge and fold it over so that it covers the lining part.
Make sure that your edge covers the edge of the lining fabric. I made sure that the two raw edges were aligned as I pinned them together.
I stitched as close to the edge as possible all the way around, leaving an opening for the elastic.
Feed your elastic through just as you did on the bottom part.
Once again bring the two ends together. Sew. Tuck into the casing. Sew the opening closed.
You are finished!!!!
If you wanted, you could add a little bow or some type of embellishment to the waistband or anywhere really.
Hope you enjoy your new creation!!!
Don't forget, we'd love to see what you've made...please upload a picture to our Flickr group.
http://www.flickr.com/groups/sewhipmama/
Sunday, January 24, 2010
Pippi and the Wild Thyme doll carrier
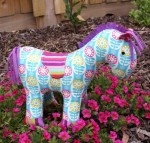
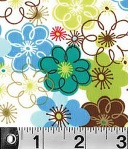
So what do you make for a three year old who loves blue, horses and flowers? My first thought was to make a horse, so I order this Melly and Me pattern, and picked out this cute fabric. A great plan and well in advance, which is unusual for me! Well, the more I thought about it, the more that I didn't feel like this was what I wanted to do. So I scrapped the idea.
Well, I looked through all of my patterns and books before I settled on this cute little doll carrier pattern that I found in my One Yard Wonders book. It was exactly what I wanted, the perfect way to carry your ponies around! It was incredibly easy to make, it took very little time in fact. This is definitely some thing that would make a great last minute gift. I decided to use two coordinating fabrics instead of just one, and with the extra fabric I even made a little blanket to go with it! I think she's going to enjoy carrying things around in it!!
*I bought my book from Barnes and Noble. The Barnes and Noble book had an extra bonus section that included this pattern. So unfortunately unless you purchased your copy from B&N, it won't be in there.
Thursday, January 21, 2010
Mini Boden and bubble skirts
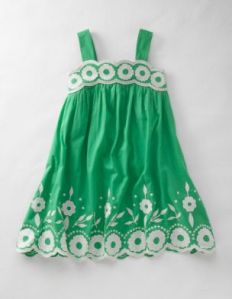
[caption id="attachment_77" align="alignleft" width="232" caption="Mini Boden Flowery Applique Dress"][/caption]
The latest Mini Boden catalog arrived in the mail today, just in time to take for car line reading material! I love the skirts and dresses from there. The bright colors and bold patterns make me so happy! Is it awful that I want some of these dresses for myself?? I love this green dress...
I'm working on a bubble skirt right now. We'll see how it goes, maybe there will be a tutorial up for it in the next few days!! I think it's going to be really cute on my almost three year old!
Wednesday, January 20, 2010
Rosette Headband Tutorial
So lately I've seen these really cute rosette headbands popping up all over the place from Anthropologie to Old Navy. I like the look of this one, but I don't love the color or the $32 price tag. So, why not make one that I love? Want to know how?
Here's what you'll need:
This is how you make it:
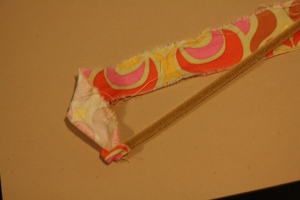
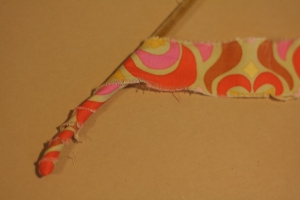
Once you have your fabric strip ready, place it at the end of the pipe cleaner, making sure to cover the end, and begin to wrap.
Continue to wrap the fabric at an angle.
As your wrapping the fabric, also start wrapping the pipe cleaner into a circular spiral type shape.
Once you reach the desired size, cut the pipe cleaner (if there's any length left) and them trim the fabric just a little longer. Cover the end again with the little extra length that you left.
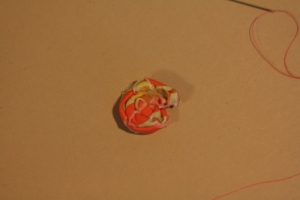
Next, with your needle threaded, begin sewing on the backside of the rosette. (You can choose which side you like better for the front and back.)
Run the stitch from one edge to the other and repeat a couple of times. The stitch shouldn't be visible from the front. Tie the end off, this will keep your rosette from coming apart.
Next place the head band in between the rosette and the felt.
Sew the rosette to the felt, making sure to sew through the elastic band if using one. Tie off the end once completed.
It should look like this. Now, repeat, if using more than one flower.
I happened to use one big and two small rosettes.
Now, go and admire your work.
Enjoy!!
We would love to see what you've made using our tutorial. Join our Flickr group!!!
http://www.flickr.com/groups/sewhipmama/
Here's what you'll need:
- a piece of fabric at least 2-3 inches x 44 inches (To make your frayed strip...lay the fabric with the selvage edge facing you. Measure over at least an inch and make a small notch with your scissors, rip the fabric all the way to the end. now you have a nice frayed edge!)
- A plastic or elastic head band, your choice. ( I happened to have an elastic one on hand.)
- a couple of pipe cleaners (thanks to a suggestion from a friend!)
- felt in your choice of colors and shapes (I used flowers in colors that coordinated with my fabric.)
- needle, thread, scissors
This is how you make it:
Once you have your fabric strip ready, place it at the end of the pipe cleaner, making sure to cover the end, and begin to wrap.
Continue to wrap the fabric at an angle.
As your wrapping the fabric, also start wrapping the pipe cleaner into a circular spiral type shape.
Once you reach the desired size, cut the pipe cleaner (if there's any length left) and them trim the fabric just a little longer. Cover the end again with the little extra length that you left.
Next, with your needle threaded, begin sewing on the backside of the rosette. (You can choose which side you like better for the front and back.)
Run the stitch from one edge to the other and repeat a couple of times. The stitch shouldn't be visible from the front. Tie the end off, this will keep your rosette from coming apart.
Next place the head band in between the rosette and the felt.
Sew the rosette to the felt, making sure to sew through the elastic band if using one. Tie off the end once completed.
It should look like this. Now, repeat, if using more than one flower.
I happened to use one big and two small rosettes.
Now, go and admire your work.
Enjoy!!
We would love to see what you've made using our tutorial. Join our Flickr group!!!
http://www.flickr.com/groups/sewhipmama/
Monday, January 18, 2010
Felt Goodies
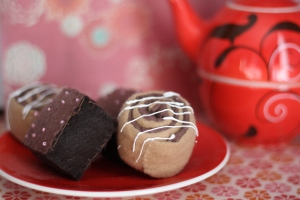
For those of you who know me, you know that I love to sew and cook. So naturally, I love to make food...that you can play with. Felt is so easy to work with, you can make a ton of these little felt goodies in no time. I usually sew them while watching tv or listening to my ipod after the kids have gone to bed. I don't have patterns for the brownies or cinnamon rolls, they were really just trial and error. I do love the way they turned out. Not sure what the next felt food item is going to be yet...but I'll keep you posted!
Wednesday, January 13, 2010
Always a diaper bag, never a Birkin...
Subscribe to:
Posts (Atom)