Sunday, March 21, 2010

Her Party!

The girl wanted a jewelry party for her 3rd birthday.  So, not quite sure what an almost three year old's idea of a jewelry party was, I decided to put my own spin on it.

Everything was based around a fabric that I found at Hobby Lobby.   Her birthday dress was made from this main fabric, I used this pattern.  It was a little short, so I guess it's more of a birthday shirt!  It was still really cute, regardless.

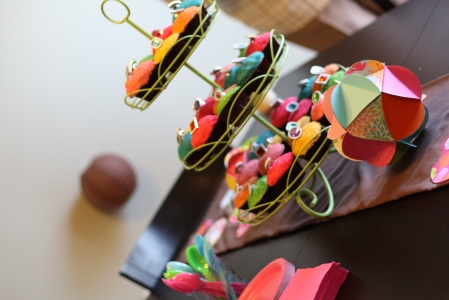
I used the same fabric for a little table runner to go under the cupcake tower.  The runner used the main fabric with a few coordinating fabrics to make varying sized circles on a brown background.  I also used this guide to make paper globes with the same colors.   I think one of my favorite parts were the paper lanterns hanging from the ceiling.  So pretty.


The cupcakes were vanilla, from my favorite recipe, with vanilla frosting covered in sparkly sugar with rings on top.  There had to be jewelry somewhere!!  I'll show you just how I made them later this week.

It was a gorgeous day here, so we grilled hamburgers and had a yummy outdoor lunch.  The kids played outside and found lots of worms.

Overall, it was a lot of fun.  The food, the colors, and spending time with friends and family.  Great party.

SYS Thurs

Saturday, March 13, 2010

Felt Daisies

I love gerbera daisies.  We used them in our wedding, bright pinks and light pinks.  They're so simple, yet their structure makes them feel elegant.

I seem to be on a flower making kick these days.  I've been making paper, crepe paper, felt and cotton fabric flowers.  Surely I can put some type of flower on just about every thing I own...right?!  Well, my latest endeavor was to attempt to make a felt gerbera daisy.  I think that I would try to make just about anything out of felt, if I had the time.  So here is a what I ended up with.  I made a few colors, and sizes.  Tried variations on the number of petals and so on.  So you can take this and tweak it to suit your own taste.

What you will need:

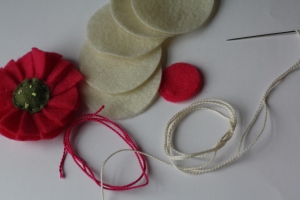
Felt -one color for the petals, one for the center, green if you want to add a leaf (I didn't make any with leaves, but I think that would be fun.)

scissors, needle, thread, small amount of fiber fill or scrap felt (to lightly stuff the center)

To begin, you will want to cut out four or five circles for the petals and the back/base of the flower.  My circle was about 2 inches wide.

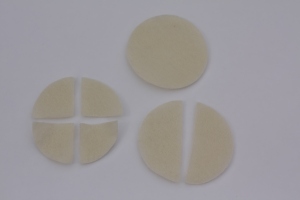
Now take three or four of those five circles and cut them in half and those halves in half as well.  You should now have four pieces per circle.  These pieces will be your petals.

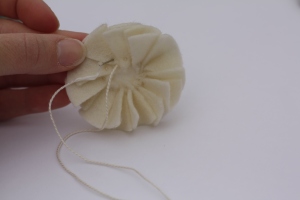
Ok, lets assemble the flower.  Grab your remaining circle, needle and one of your petal pieces.  Fold the piece in half and put a stitch in the bottom to hold it together.

Place it on top of the circle, with a small amount of the petal hanging over the edge of the base circle.

Continue to add petals, making sure to over lap the previous petal with the open side on top.

You can add as many petals as you want.  I used 12 on this particular flower, although I think it needed at least on more!

Next grab you other color of felt for the center, cut a smaller circle.   I used a 1 inch circle for this.

I added a few french knots randomly on this piece. (optional of course!)

Now, place it in the center and sew it almost all the way around, leaving a small opening to stuff a tiny bit of fiberfill or scrap of felt in there.  Sew the remaining section.  And you are finished!  You can add a brooch back , hair clip or sew  it to whatever you want! 

Tuesday, March 9, 2010

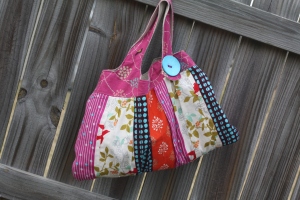
The Pleats Shoulder Bag

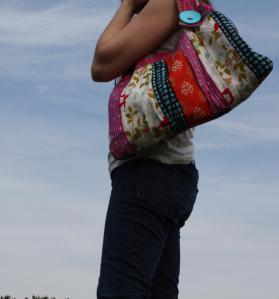
So you may remember that I had plans to make a new travel tote awhile back.  I am happy to report that I did finish it and I must tell you that I LOVE it!!  Truly, I cannot say enough good things about this bag.  I am in love with the fabrics' colors.  It's just what I needed to brighten up these late winter blahs.  The pattern was so simple and easy to follow.  I just kept thinking "I must be doing something wrong...it's too easy".  I did forget to add the seam allowances when I cut the pattern out, so it's a little smaller than intended, but it's just fine the way it is.  There is ample amounts of space in here, you wouldn't believe all the stuff that I put in there!  I can definitely see more of these bags being made in the future.

So if you are interested, this is the pattern.

The fabric is Echino Birds to hang (the top and handles) and Birds and Berries (main panel).

The lining is just a natural cotton.

I hope that if you make this bag you love it as much as I do!!

Tuesday, March 2, 2010

The boy's cake!


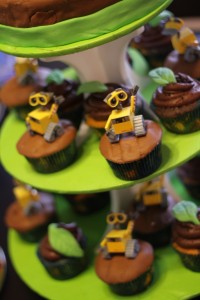
So the Wall-e party was lots of fun!  Complete with a cake and cupcakes.  The big boy, who turned 5, loved it.

The cake was a vanilla cake with chocolate fudge frosting, yum!!

We even had a few Wall-e cookies in the goody bags for his friends to take home.

Lots of fun for my big boy!!

I'll be back with pictures of the new bag in a couple of days, now off to sunny Florida!!  Good bye snow.