Wednesday, October 20, 2010

Sew Hip Kids

As you know, I love to sew and make things.  I've been selling my designs since 2007. This past weekend I was invited to sell some of my things at a small venue.  It was lots of fun, and I wanted to share some pictures with you.  I will be selling at another show in November and after that I will probably put some thing in my Etsy shop...so if you see anything you are interested in, let me know!

I had a variety of things that I make available on Saturday.  There were skirts and aprons.

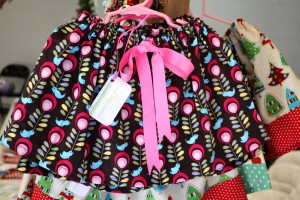
This corduroy skirt, which happened to be my favorite, used brown birds from Robert Kaufmans Cool Cords line.  I made matching hair clips to go with the skirts.  I love them!!


You can see them in the top portion of the picture below.  I made them in a blue colorway to match the blue bird skirt as well.


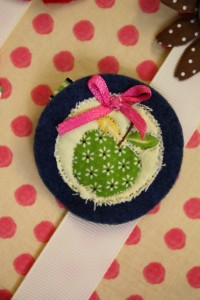
These little apple hair clips are so cute!  I am seriously considering making one for myself.  Is that crazy?

 
This hair clip display board was made from an old ikea print that had ripped and landed in our trash pile.  I rescued it and stowed it away in a closet until it hit me that I could use it to display the hair clips.  I love this fabric.  It's from Tina Givens Fairy Tip Toes line.

 
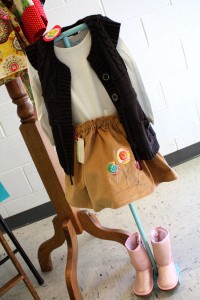
This little display stand is based on a really cool one that my friend B has.  (She also painted the sign hanging above for a show we did last year...she is SO talented!!)  It worked great for displaying this fun skirt.  Again, what would you think of a mommy sized version of this skirt?  I really want one...

 
There was even a little section of "gourmet" felt food items!  My kids play with felt foods I've made on a daily basis, in fact, they even snagged a pot and some pasta that I had intended to display on the little stove top!


I had a nice long nap after it was over.  Sunday had no plans, so we just stayed home and I attempted to make sense of the chaos that is my "sewing studio"

Please and Thank you

I'm glad that these tutorials have been helpful to so many of you.  I would ask that you PLEASE do not sell things that you've made using my ideas.  Please contact me if you have questions.  Thanks!

Tuesday, October 5, 2010

The Hat

Ok, so...here it is, a few days later than promised!  Sorry, sometimes it seems that finding an extra hour or two to post a new tutorial is impossible!


What you will need...

  • Fleece

  • ruler

  • scissors or rotary cutter

  • thread and a needle, sewing machine


For the flower

  • 3" strip of 44"long fabric

  • needle, thread, pins


Measure the head of your recipient!  For my 5 year old son, I cut a piece of fleece 22" by 12", and for my 3 year old daughter I cut a 20" by 10".

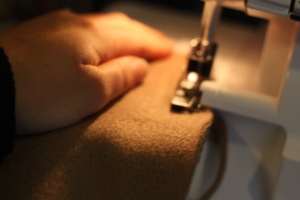
Bring the short sides together, sew from end to end.

You should have a tube.  Now sew along the top.   There should only be one opening now, you can see the basic shape of a hat!

Take the open edge and fold it up a 1/2-1", your choice.  (Make sure that all of your seam are on the same side, so that when you flip the hat the right way, you don't throw it across the room when you realize that the cute hat you just finished has an unfinished seam exposed on the top of the hat... you will not enjoy fixing your mistake...I didn't...)  Sew all the way around, I used two seems, just because I liked the way it looked.

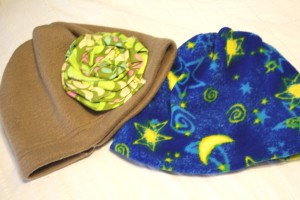
Now grab your needle and thread it, start on one end a sew a big gathering stitch all the way across the top.  When you get to the end, pull it tight and gather the fabric.  Knot the end a few times and you are done with the hat.  Easy peasy.

Ok, for the flower.  It's much like many of the other flowers on the blog, but this time instead of rolling them, I simply folded the fabric.  I didn't take pictures for this step...Sorry, but it's really easy I promise!

  • Take your strip of fabric and fold it in half, you can iron it if you want to make sure it really stays folded, I didn't, because I like the messy look.

  • Begin by folding or just knotting the end so that you have a center, again, just depends on if you like the raw edge showing more.

  • Once you have a knot in the center, begin to fold the fabric once and twist.  Keep doing this until you reach the end of your fabric, fold the end under the last section.  You can pin it as you go, if you want to make sure it doesn't fall apart when you start to sew it together, ahem...

  • Sew from the back, make sure to sew through all layers.  (This is just like the way you sew this and this.)  Finish off the end with a good strong knot!

  • Now you can pin this to the hat wherever you want it.  Sew it on and you are finished!  I made several of these flowers, attached them to various things, like a hair clip and then clipped it on to the side of a headband!